实战STT本地部署——OpenAI大厂出品whisper工具
STT(Speech To Text) & ASR(Automatic Speech Recognition)
在会议中常常需要录音和记录总结,将录音转成文字是很常见的需求,即STT,在计算机中更多地将这个服务称为ASR。目前很多厂商都有该服务,且收费价格也不尽相同。根据chatgpt的答案,
以下是当前网络上主流的语音转文字(STT)或自动语音识别(ASR)服务及其收费标准:
服务提供商 服务名称 收费标准 免费额度 参考链接 微软 Azure 语音服务 - 标准语音转文本:每月 5 小时免费,超出部分按秒计费。 - 自定义语音转文本:每月 5 小时免费,超出部分按秒计费。 - 文本转语音(神经网络版):每月 50 万字符免费,超出部分按字符计费。 每月 5 小时免费音频(语音转文本);每月 50 万字符免费(文本转语音) Azure AI 语音定价 百度 AI 开放平台 短语音识别标准版 - 按调用次数计费,支持“按次数包预付费”和“按调用量阶梯后付费”两种方式。 - 具体价格根据所选模型(如中文普通话、粤语、英语、四川话等)和调用量而定。 免费调用额度,具体额度视账户情况而定 百度 AI 语音识别价目表 谷歌云 Speech-to-Text API - 标准识别模型:每月处理的音频分钟数在 0-60 分钟范围内,按每分钟收费,超过 60 分钟的部分按更低的每分钟价格收费。 - 具体价格根据使用的模型和每月处理的音频分钟数而定。 每月 60 分钟免费 Google Cloud Speech-to-Text API 价格 阿里云 智能语音交互 - 一句话语音识别服务:按调用次数计费。 - 录音文件识别服务:按录音时长计费。 - 语音合成服务:按字符数计费。 免费调用额度,具体额度视账户情况而定 阿里云智能语音交互费用说明 腾讯云 语音识别服务 - 实时语音识别、一句话识别、语音流异步识别、录音文件识别极速版:按使用量每日计费。 - 录音文件识别和情绪识别:按使用量每日计费。 免费调用额度,具体额度视账户情况而定 腾讯云语音识别计费概述 华为云 语音交互服务 - 接口调用费用根据调用时长收费,可按实际使用量付费或购买套餐包。 免费调用额度,具体额度视账户情况而定 华为云语音交互服务价格 Sonix 自动转录服务 - 即用即付:每音频小时约 $10。 - 月度订阅:每月 $22 起,包含一定小时数,超出部分按每小时收费。 免费试用,具体额度视账户情况而定 Sonix 转录服务价格 请注意,以上价格可能会因地区、使用量、服务等级等因素而有所不同,且可能随时间调整。建议在使用前查看各服务提供商的官方网站以获取最新的定价信息。
而在2022年,著名的OpenAI开源了一个模型whisper,可以免费下载和部署使用。因为是基于pytorch,还是需要Nvidia的显卡加速。刚好最近有一个音频需要转成文字,接下来就实际部署并运行看看吧。
部署
根据官方文档仓库的说明,他们在Python 3.9.9 和 PyTorch 1.10.1上对模型进行训练和测试的,但是仍然能兼容Python 3.8-3.11和最新的PyTorch版本。我实际在conda上创建Python 3.12和PyTorch 2.5.1的环境,仍然能够正常运行。
conda create -n whisper python=3.12
创建完之后直接激活环境并安装即可:
conda activate whisper
pip install -U openai-whisper
但是在我的笔记本Ubuntu 22.04上测试时,会报错,需要重新安装pytorch
pip uninstall torch torchvison torchaudio
pip3 install torch torchvision torchaudio --index-url https://download.pytorch.org/whl/cu121
除此之外还要安装ffmpeg对音频进行解码:
# on Ubuntu or Debian
sudo apt update && sudo apt install ffmpeg

# on Arch Linux
sudo pacman -S ffmpeg

# on MacOS using Homebrew (https://brew.sh/)
brew install ffmpeg

# on Windows using Chocolatey (https://chocolatey.org/)
choco install ffmpeg

# on Windows using Scoop (https://scoop.sh/)
scoop install ffmpeg
然后就可以开始进行STT转换了。
运行
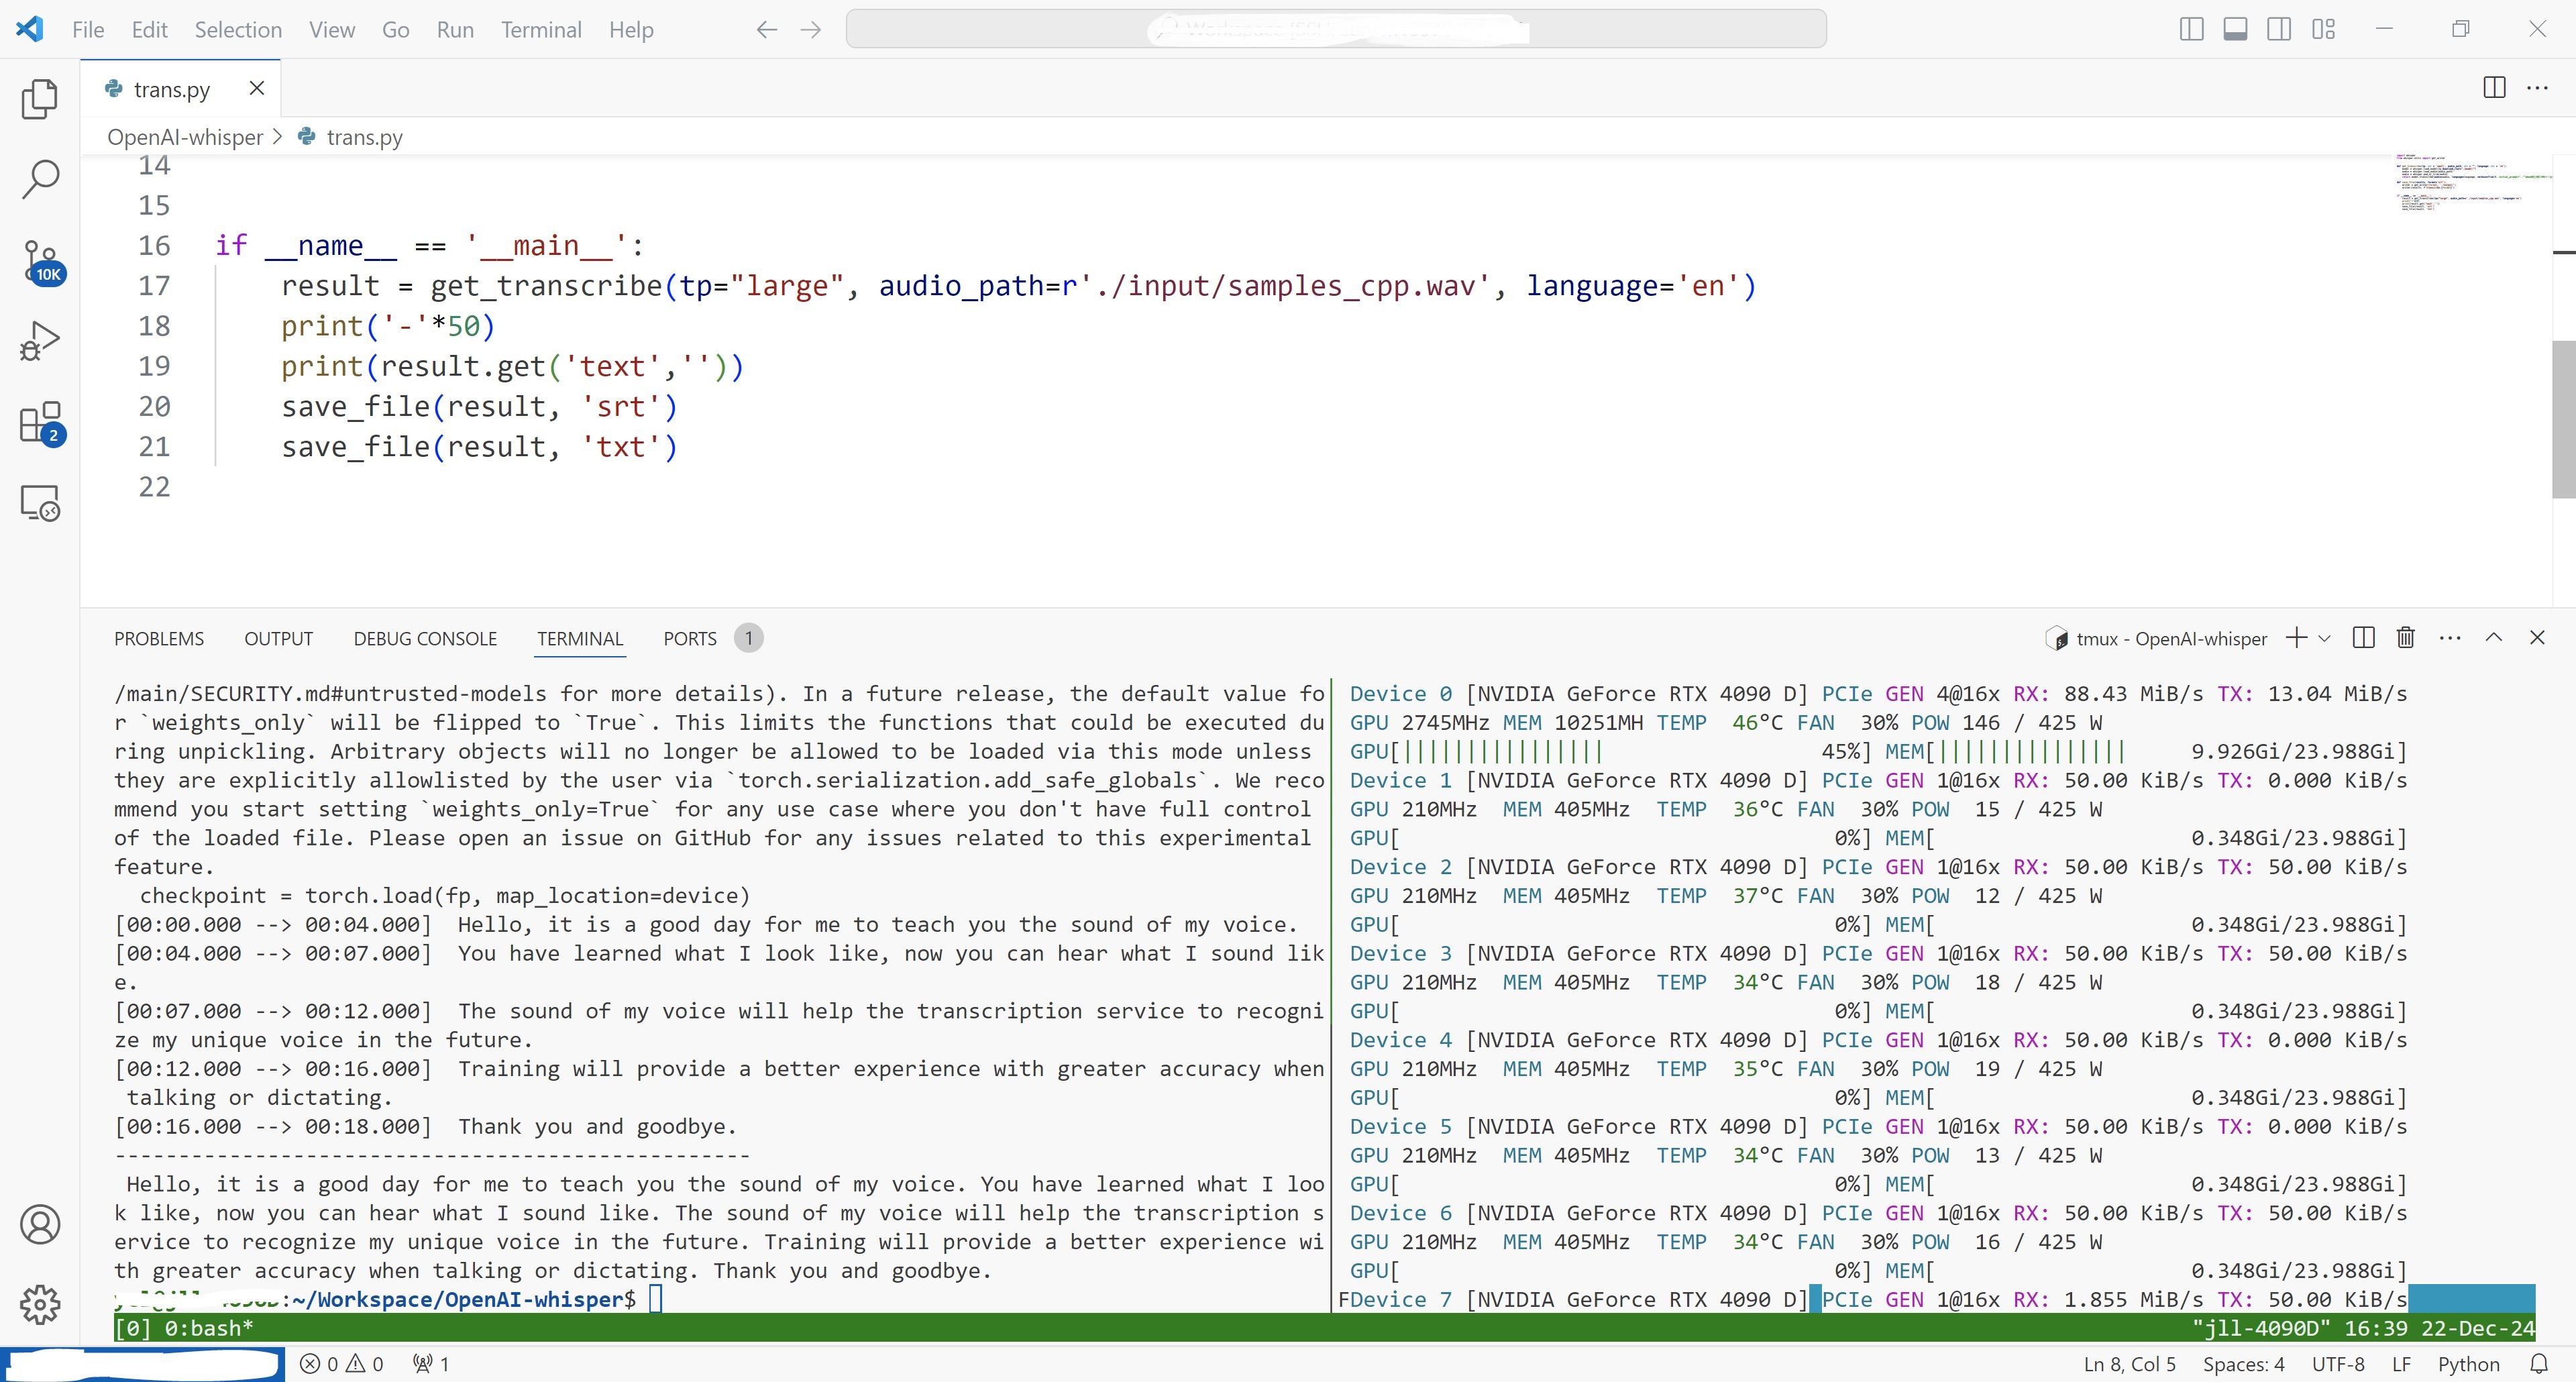
whisper有命令行接口,也可以用python,官方在README中也给出了相应的使用。但是却缺少了输出格式和中文支持,于是只能使用万能的搜索引擎了。下面先给出我自己使用的成品代码:
import whisper
from whisper.utils import get_writer


def get_transcribe(tp: str = 'small', audio_path: str = "", language: str = 'zh'):
    model = whisper.load_model(tp,download_root="./model/")
    audio = whisper.load_audio(audio_path)
    #audio = whisper.pad_or_trim(audio)
    return model.transcribe(audio=audio, language=language, verbose=True, initial_prompt="风波不信菱枝弱,月露谁教桂叶香。直道相思了无益,未妨惆怅是清狂!", beam_size=5)

def save_file(results, format='srt'):
    writer = get_writer(format, './output/')
    writer(results, f'transcribe.{format}')


if __name__ == '__main__':
    result = get_transcribe(tp="turbo", audio_path=r'./input/sample_audio.m4a')
    print('-'*50)
    print(result.get('text',''))
    save_file(result, 'srt')
    save_file(result, 'txt')
首先说一下模型的选择,下面放出官方的表格:
| Size | Parameters | English-only model | Multilingual model | Required VRAM | Relative speed |
|---|---|---|---|---|---|
| tiny | 39 M | tiny.en |
tiny |
~1 GB | ~10x |
| base | 74 M | base.en |
base |
~1 GB | ~7x |
| small | 244 M | small.en |
small |
~2 GB | ~4x |
| medium | 769 M | medium.en |
medium |
~5 GB | ~2x |
| large | 1550 M | N/A | large |
~10 GB | 1x |
| turbo | 809 M | N/A | turbo |
~6 GB | ~8x |
这里最小的模型tiny只有39M的参数量,速度也是最快的。我的笔记本显卡只有4G显存,所以最高也只能跑small的模型。运行的时候,模型权重需要下载,最好使用代理进行科学上网。然后就是加载音频的路径,whisper支持音频的格式有mp3、wav、m4a等格式。官方也给出了在两个开源数据集Common Voice 15和Fleurs上各种语言的词错误率和字符错误率:
可以看到广东话的错误率在Common Voice 15数据集上甚至比普通话还要低。在这两个数据集上的表现上英文的错误率也普遍比中文更低。函数whisper.pad_or_trim用于填充或者修剪音频到30s长度,用于测试各个参数时很有用,需要正常处理音频时通常注释掉该函数。接下来就是最关键的函数transcribe,通过官方的代码和注释可以看到:
def transcribe(
    model: "Whisper",
    audio: Union[str, np.ndarray, torch.Tensor],
    *,
    verbose: Optional[bool] = None,
    temperature: Union[float, Tuple[float, ...]] = (0.0, 0.2, 0.4, 0.6, 0.8, 1.0),
    compression_ratio_threshold: Optional[float] = 2.4,
    logprob_threshold: Optional[float] = -1.0,
    no_speech_threshold: Optional[float] = 0.6,
    condition_on_previous_text: bool = True,
    initial_prompt: Optional[str] = None,
    carry_initial_prompt: bool = False,
    word_timestamps: bool = False,
    prepend_punctuations: str = "\"'“¿([{-",
    append_punctuations: str = "\"'.。,,!!??::”)]}、",
    clip_timestamps: Union[str, List[float]] = "0",
    hallucination_silence_threshold: Optional[float] = None,
    **decode_options,
):
    """
    Transcribe an audio file using Whisper

    Parameters
    ----------
    model: Whisper
        The Whisper model instance

    audio: Union[str, np.ndarray, torch.Tensor]
        The path to the audio file to open, or the audio waveform

    verbose: bool
        Whether to display the text being decoded to the console. If True, displays all the details,
        If False, displays minimal details. If None, does not display anything

    temperature: Union[float, Tuple[float, ...]]
        Temperature for sampling. It can be a tuple of temperatures, which will be successively used
        upon failures according to either `compression_ratio_threshold` or `logprob_threshold`.

    compression_ratio_threshold: float
        If the gzip compression ratio is above this value, treat as failed

    logprob_threshold: float
        If the average log probability over sampled tokens is below this value, treat as failed

    no_speech_threshold: float
        If the no_speech probability is higher than this value AND the average log probability
        over sampled tokens is below `logprob_threshold`, consider the segment as silent

    condition_on_previous_text: bool
        if True, the previous output of the model is provided as a prompt for the next window;
        disabling may make the text inconsistent across windows, but the model becomes less prone to
        getting stuck in a failure loop, such as repetition looping or timestamps going out of sync.

    word_timestamps: bool
        Extract word-level timestamps using the cross-attention pattern and dynamic time warping,
        and include the timestamps for each word in each segment.

    prepend_punctuations: str
        If word_timestamps is True, merge these punctuation symbols with the next word

    append_punctuations: str
        If word_timestamps is True, merge these punctuation symbols with the previous word

    initial_prompt: Optional[str]
        Optional text to provide as a prompt for the first window. This can be used to provide, or
        "prompt-engineer" a context for transcription, e.g. custom vocabularies or proper nouns
        to make it more likely to predict those word correctly.

    carry_initial_prompt: bool
        If carry_initial_prompt is True, `initial_prompt` is prepended to the prompt of each internal
        `decode()` call. If there is not enough context space at the start of the prompt, it is
        left-sliced to make space.

    decode_options: dict
        Keyword arguments to construct `DecodingOptions` instances

    clip_timestamps: Union[str, List[float]]
        Comma-separated list start,end,start,end,... timestamps (in seconds) of clips to process.
        The last end timestamp defaults to the end of the file.

    hallucination_silence_threshold: Optional[float]
        When word_timestamps is True, skip silent periods longer than this threshold (in seconds)
        when a possible hallucination is detected

    Returns
    -------
    A dictionary containing the resulting text ("text") and segment-level details ("segments"), and
    the spoken language ("language"), which is detected when `decode_options["language"]` is None.
    """
最关键的几个是模型、音频。其它的参数包括decode_options里的设置。根据网上中文的语音识别优化指南,我们可以把language设置成zh,然后加入initial_prompt来作为引导,让其听写出的文本加入标点符号。关于其它的temperature等变量可以根据官方的提示自行尝试。最后就是输出格式的问题了,根据这篇博客,我们可以直接输出字幕格式srt文件和txt文件,对于大多数后续处理都已经足够了。将导出的文本放入大模型进行校对和总结,就能得到想要的结果了。
通常来说某些录音有隐私性,所以推荐本地搭建和处理,当然也有开源的网页服务,笔者不再赘述,可以自行用docker在局域网内搭建和使用。
| 微信(WeChat Pay) | 支付宝(AliPay) |

|

|
| 比特币(Bitcoin) | 以太坊(Ethereum) |

|

|
| 以太坊(Base) | 索拉纳(Solana) |

|

|