树莓派+Cloudflare组合拳
免费顶级域名真不好申请啊
惯例废话,最近搞了个us.kg的域名,首先感谢师弟的推荐!注册到托管到Cloudflare只用了三天。总结一下现有可托管到Cloudflare的免费域名申请:
- Freenom:凉透了,因为很多注册域名用于钓鱼网站,被meta告了滥用。
- Namecheap:学生可以免费注册
.me的域名,可以通过GitHub的学生包获取。但是GitHub学生认证相比之前麻烦一点。 - eu.org:基本凉凉,网站注册申请,不需要信用卡,但是审核时间很长。
- nom.za:基本凉凉,南非的域名注册,跟
eu.org一样长期免费,审核时间太长。 - pp.ua:乌克兰的域名提供商,需要绑定信用卡,新注册送优惠券。
- Cloudns:免费注册,可申请
.cloudns.be和cloudns.ch的域名,但是不能托管到Cloudflare,这两个域名后缀可以通过添加CNAME的方式将cloudflare pages转发到对应域名,搭建博客可用。.cloudns.org和.cloudns.biz可以托管到Cloudflare但是目前申请不到。 - us.kg:免费注册,需要KYC认证,可以捐1$直接审核。也可以在GitHub上提交KYC认证,实测三个工作日搞定。
有需要的可以搞一波上车,搭配树莓派食用更香。
网络摄像头
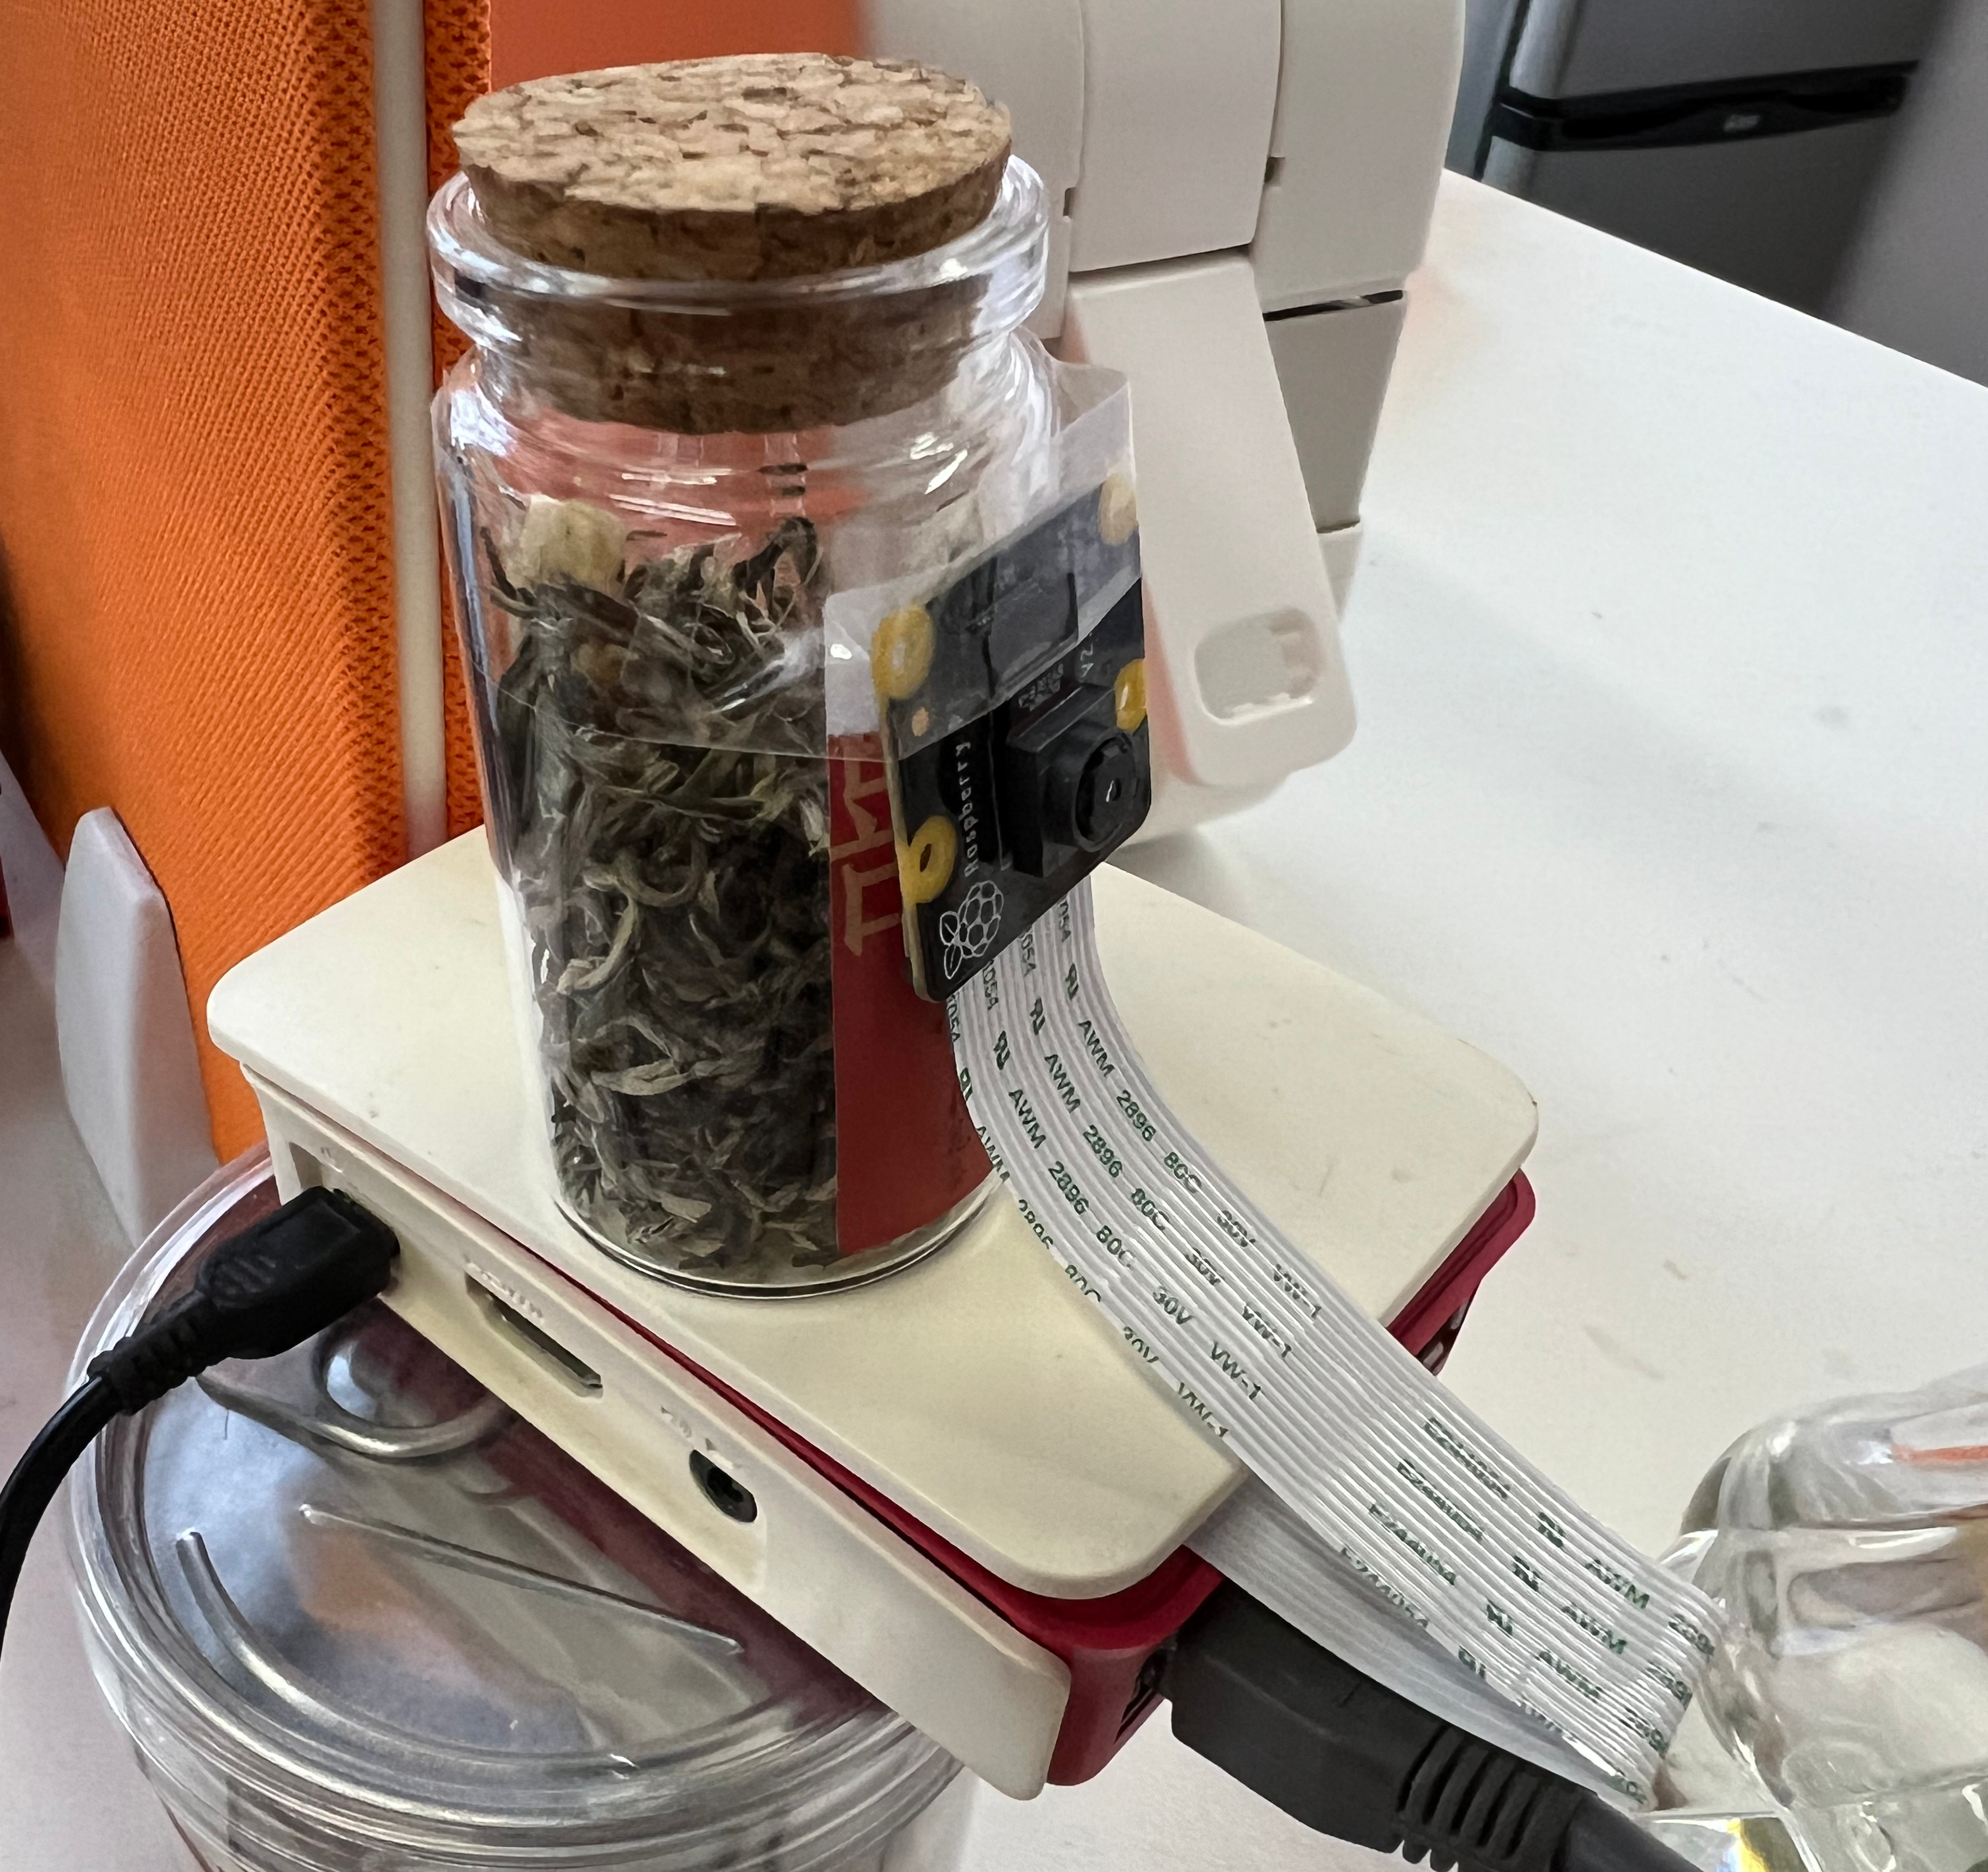
最近想起来有一个闲置的摄像头,可以搭配树莓派做一个远程监控,配合域名做一个类似动态DNS的访问。摄像头是Raspberry Pi Camera V2 NoIR版本,最高支持1080P录制,没有IR滤波器在黑暗场景下可以看清一丢丢。硬件安装上直接将CSI带子插入树莓派对应接口后固定好摄像头即可。
接下来就是设置打开相机设备,在命令行输入sudo raspi-config然后在Interface-option中把相机接口打开即可,新版本的系统好像逐渐会丢弃该选项。然后就是安装相应的软件包,这里选择使用motion,直接sudo apt install motion,然后打开/etc/motion/motion.conf进行配置,可以先备份一下原始配置cp /etc/motion/motion.conf /etc/motion/motion.conf.bak 。个人主要关注以下几项
# Start in daemon (background) mode and release terminal (default: off)
daemon on # 后台模式 打开后作为服务在后端运行

# Rotate image this number of degrees. The rotation affects all saved images as
# well as movies. Valid values: 0 (default = no rotation), 90, 180 and 270.
rotate 0 # 旋转角度,可以根据安装位置进行设置

# Image width (pixels). Valid range: Camera dependent, default: 320
width 640 # 宽度

# Image height (pixels). Valid range: Camera dependent, default: 240
height 360 #高度

# Maximum number of frames to be captured per second.
# Valid range: 2-100. Default: 100 (almost no limit).
framerate 20 # 帧率

# Let motion regulate the brightness of a video device (default: off).
# The auto_brightness feature uses the brightness option as its target value.
# If brightness is zero auto_brightness will adjust to average brightness value>
# Only recommended for cameras without auto brightness
auto_brightness off # 自动亮度 建议关闭 晚上关灯一片黑情况下会闪屏

############################################################
# Image File Output
############################################################

# Output 'normal' pictures when motion is detected (default: off)
# Valid values: on, off, first, best, center
# When set to 'first', only the first picture of an event is saved.
# Picture with most motion of an event is saved when set to 'best'.
# Picture with motion nearest center of picture is saved when set to 'center'.
# Can be used as preview shot for the corresponding movie.
output_pictures off # 输出捕捉到动作的图片,存储太小建议关闭

# Output pictures with only the pixels moving object (ghost images) (default: o>
output_debug_pictures off

# The quality (in percent) to be used by the jpeg and webp compression (default>
quality 75 # 图像压缩的质量

# Type of output images
# Valid values: jpeg, ppm or webp (default: jpeg)
picture_type jpeg # 图像输出的格式

############################################################

# Use ffmpeg to encode videos of motion (default: off)
ffmpeg_output_movies off # 输出捕捉到动作的视频,存储太小建议关闭

# Container/Codec output videos
# Valid values: mpeg4, msmpeg4, swf,flv, ffv1, mov, mp4, mkv, hevc
ffmpeg_video_codec mkv # 视频输出格式

# Target base directory for pictures and films
# Recommended to use absolute path. (Default: current working directory)
target_dir /home/pi/Pictures # 目标输出目录

# File path for motion triggered images (jpeg, ppm or .webp) relative to target>
# Default: %v-%Y%m%d%H%M%S-%q
# Default value is equivalent to legacy oldlayout option
# For Motion 3.0 compatible mode choose: %Y/%m/%d/%H/%M/%S-%q
# File extension .jpg, .ppm or .webp is automatically added so do not include t>
# Set to 'preview' together with best-preview feature enables special naming
# convention for preview shots. See motion guide for details
picture_filename %v-%Y%m%d%H%M%S-%q # 输出图片文件名格式

# File path for motion triggered ffmpeg films (movies) relative to target_dir
# Default: %v-%Y%m%d%H%M%S
# File extensions(.mpg .avi) are automatically added so do not include them
movie_filename %v-%Y%m%d%H%M%S # 输出视频文件名格式

# The mini-http server listens to this port for requests (default: 0 = disabled)
stream_port 80 # 输出网页视频流端口

# Quality of the jpeg (in percent) images produced (default: 50)
stream_quality 50 # 输出网页视频流质量

# Output frames at 1 fps when no motion is detected and increase to the
# rate given by stream_maxrate when motion is detected (default: off)
stream_motion off # 输出网页视频流中检测到动作后保存图片帧,存储太小建议关闭

# Maximum framerate for stream streams (default: 1)
stream_maxrate 20 # 输出网页视频流的最大帧率

# Restrict stream connections to localhost only (default: on)
stream_localhost off # 仅限局域网访问

# Set the authentication method (default: 0)
# 0 = disabled
# 1 = Basic authentication
# 2 = MD5 digest (the safer authentication)
stream_auth_method 2 # 网络流访问认证 建议开启2

# Authentication for the stream. Syntax username:password
# Default: not defined (Disabled)
stream_authentication admin:password # 设置用户名和密码,可设置多个
stream_authentication pi:password

# The full path and file name of the program/script to be executed when a picture is saved.
# You can use Conversion Specifiers and spaces as part of the command. This can be any type of program or script. Remember to set the execution bit in the ACL and if it is a script type program such as perl or bash also remember the shebang line (e.g. #!/user/bin/perl) as the first line of the script.
# Use %f for passing filename (with full path) to the command.
on_picture_save send_notification.sh %f
配置好之后就可以使用命令sudo motion开启你的网络摄像头了。如果需要重新修改配置,可以使用命令sudo service motion stop来停止,然后进行修改。某些情况下可能无法停止,可以直接kill进程sudo ps -aux | grep motion | awk '{print $2}' | head -1 | xargs sudo kill -9,参考这里。开启之后访问”http://树莓派ip:设置的端口“,就可以输入用户名和密码,然后看到视频流了。
2025.1.27更新
可以通过使用on_picture_save设置通知脚本,当检测到motion时,软件会自动保存图片到目标文件夹,保存完成后会触发设置脚本的运行。我们可以通过使用该设置配合脚本来发送通知和图片。根据上面配置文件的描述,可以使用%f来传递保存文件路径的参数。使用tg来发送通知,send_notification.sh脚本如下:
#!/bin/bash
curl -X POST -H "Content-Type: application/json" -d "{"chat_id": "xxx", "text": "Motion detected and the picture saved in: $1 !"}"  https://api.telegram.org/your_bot_key/sendMessage

curl -F "chat_id=your_chat_id" -F "photo=@$1" https://api.telegram.org/your_bot_key/sendPhoto
这样就可以第一时间收到motion保存图片的通知了。
至此树莓派的设置基本完成,接下来就是加入Cloudflare的动态DNS了。
登录到Cloudflare之后,选择Zero Trust->Networks->Tunnels,在该页面点击Create a tunnel,这里会提示安装cloudflared。根据不同平台有不同的版本,树莓派3可以去GitHub上直接下载armhf的deb,使用命令dpkg -i cloudflared-linux-armhf.deb进行安装即可。后面还有安装service+key的命令记得运行一下。然后就可以在网页上看到配置pubic hostname的页面:
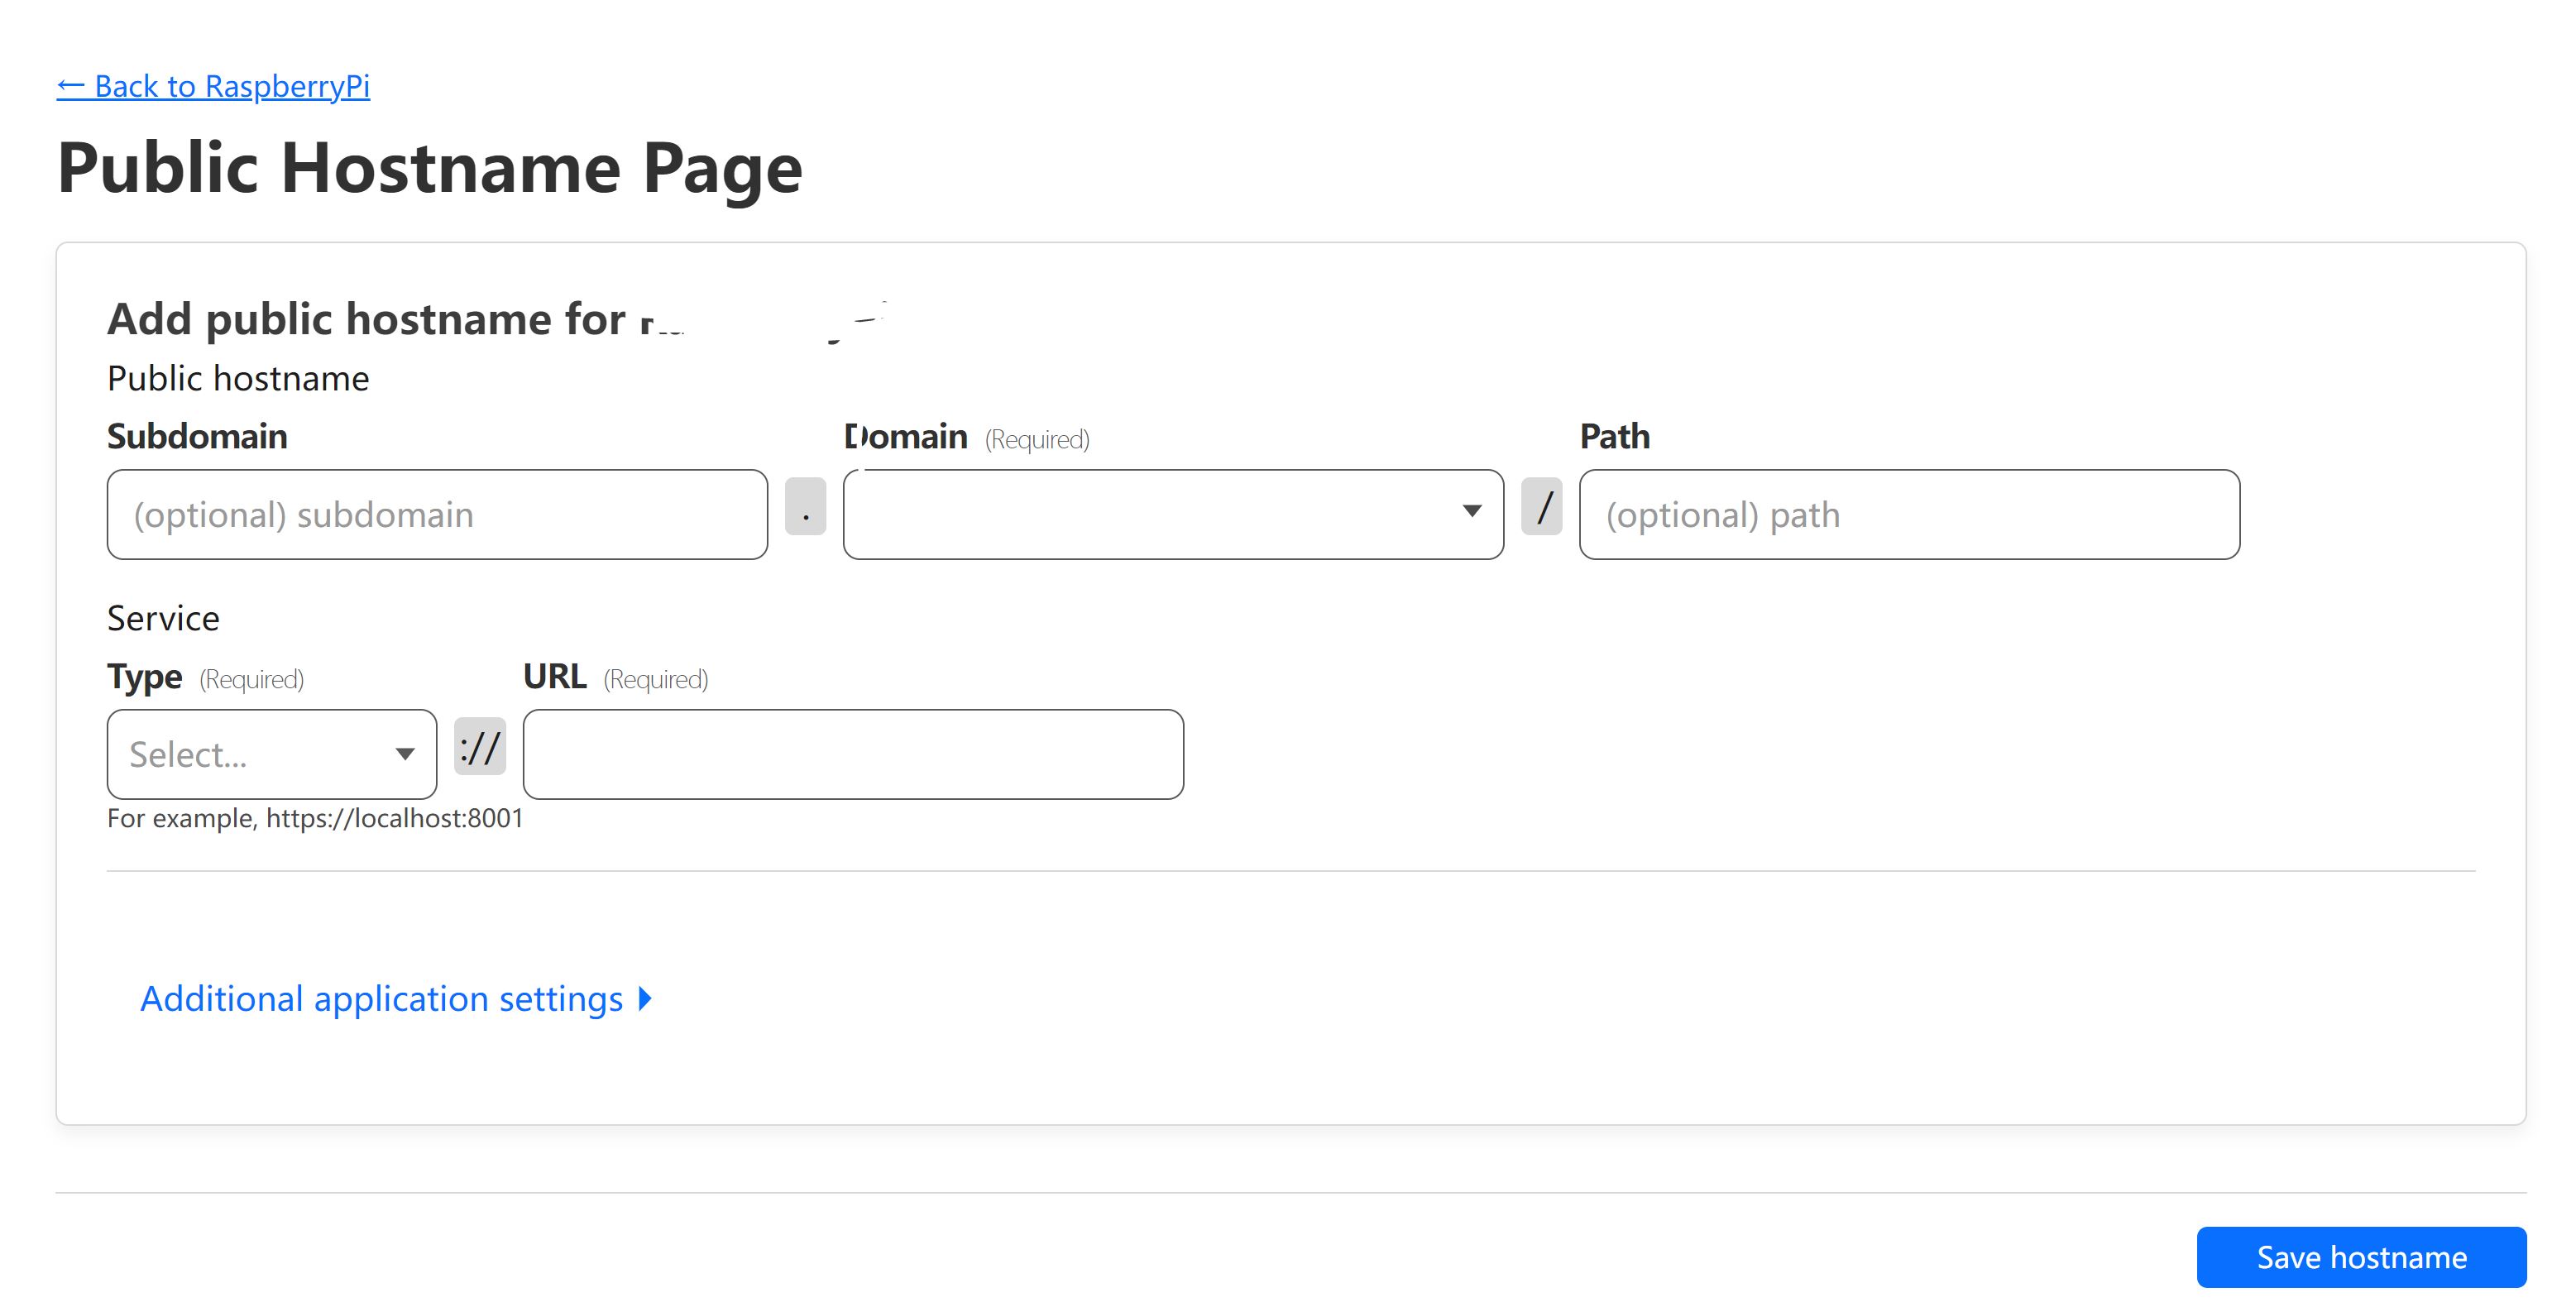
可以在subdomain上填入自己喜欢的子域名,domain里填上托管在cloudflare上的域名,type里选http,url填入”localhost:网页视频流端口”。保存之后过几秒就可以打开配置好的域名查看了。为了安全起见,可以在zero trust->access->application里加入邮箱验证,下一节会详细说。有时候tunnel会不太稳定,状态会出现“Down”或者“Degraded”的情况,为了更好地使用,可以在树莓派上添加定时任务重启cloudflared后台程序。一般使用crontab来进行定时任务设置,命令sudo crontab -e,进入编辑页面后加入一行0 0 * * * systemctl restart cloudflared,这样每天0点就会重启cloudflared后台了。
顺便说一下,树莓派的摄像头是可以手动调节焦距的,需要用到购买时送的白色工具,卡到摄像头前的凹槽里旋转,注意不要太大力,可能对设备造成损坏。
WebSSH远程控制
一般大家在使用树莓派时都安装了sshd的服务,这里就不赘述了。简单说说在cloudflare中开启tunnel和webssh的方法。依然是在zero trust里选择,在点击access->applications时,会提示选择plan。这还用问吗?当然是选择穷鬼套餐,free走起。但是,它会提示你添加支付方式,有visa之类的信用卡可以直接填,没有的注册一下PayPal也可以。不用慌,还是可以免费用上穷鬼套餐的。
开启webssh之前,先按照上面设置tunnel的步骤对ssh服务进行配置,添加public hostname。在Service里选择ssh,URL里填上”localhost:端口”即可。但是亲测设置之后并不能直接通过public hostname进行ssh连接。下面给出两个方案:
- 在树莓派上部署webssh服务重新设置tunnel映射
- 使用application自带的webssh
第一个方案请自行参考webssh。下面细说第二个,在选完支付方式之后,添加application,如下图:
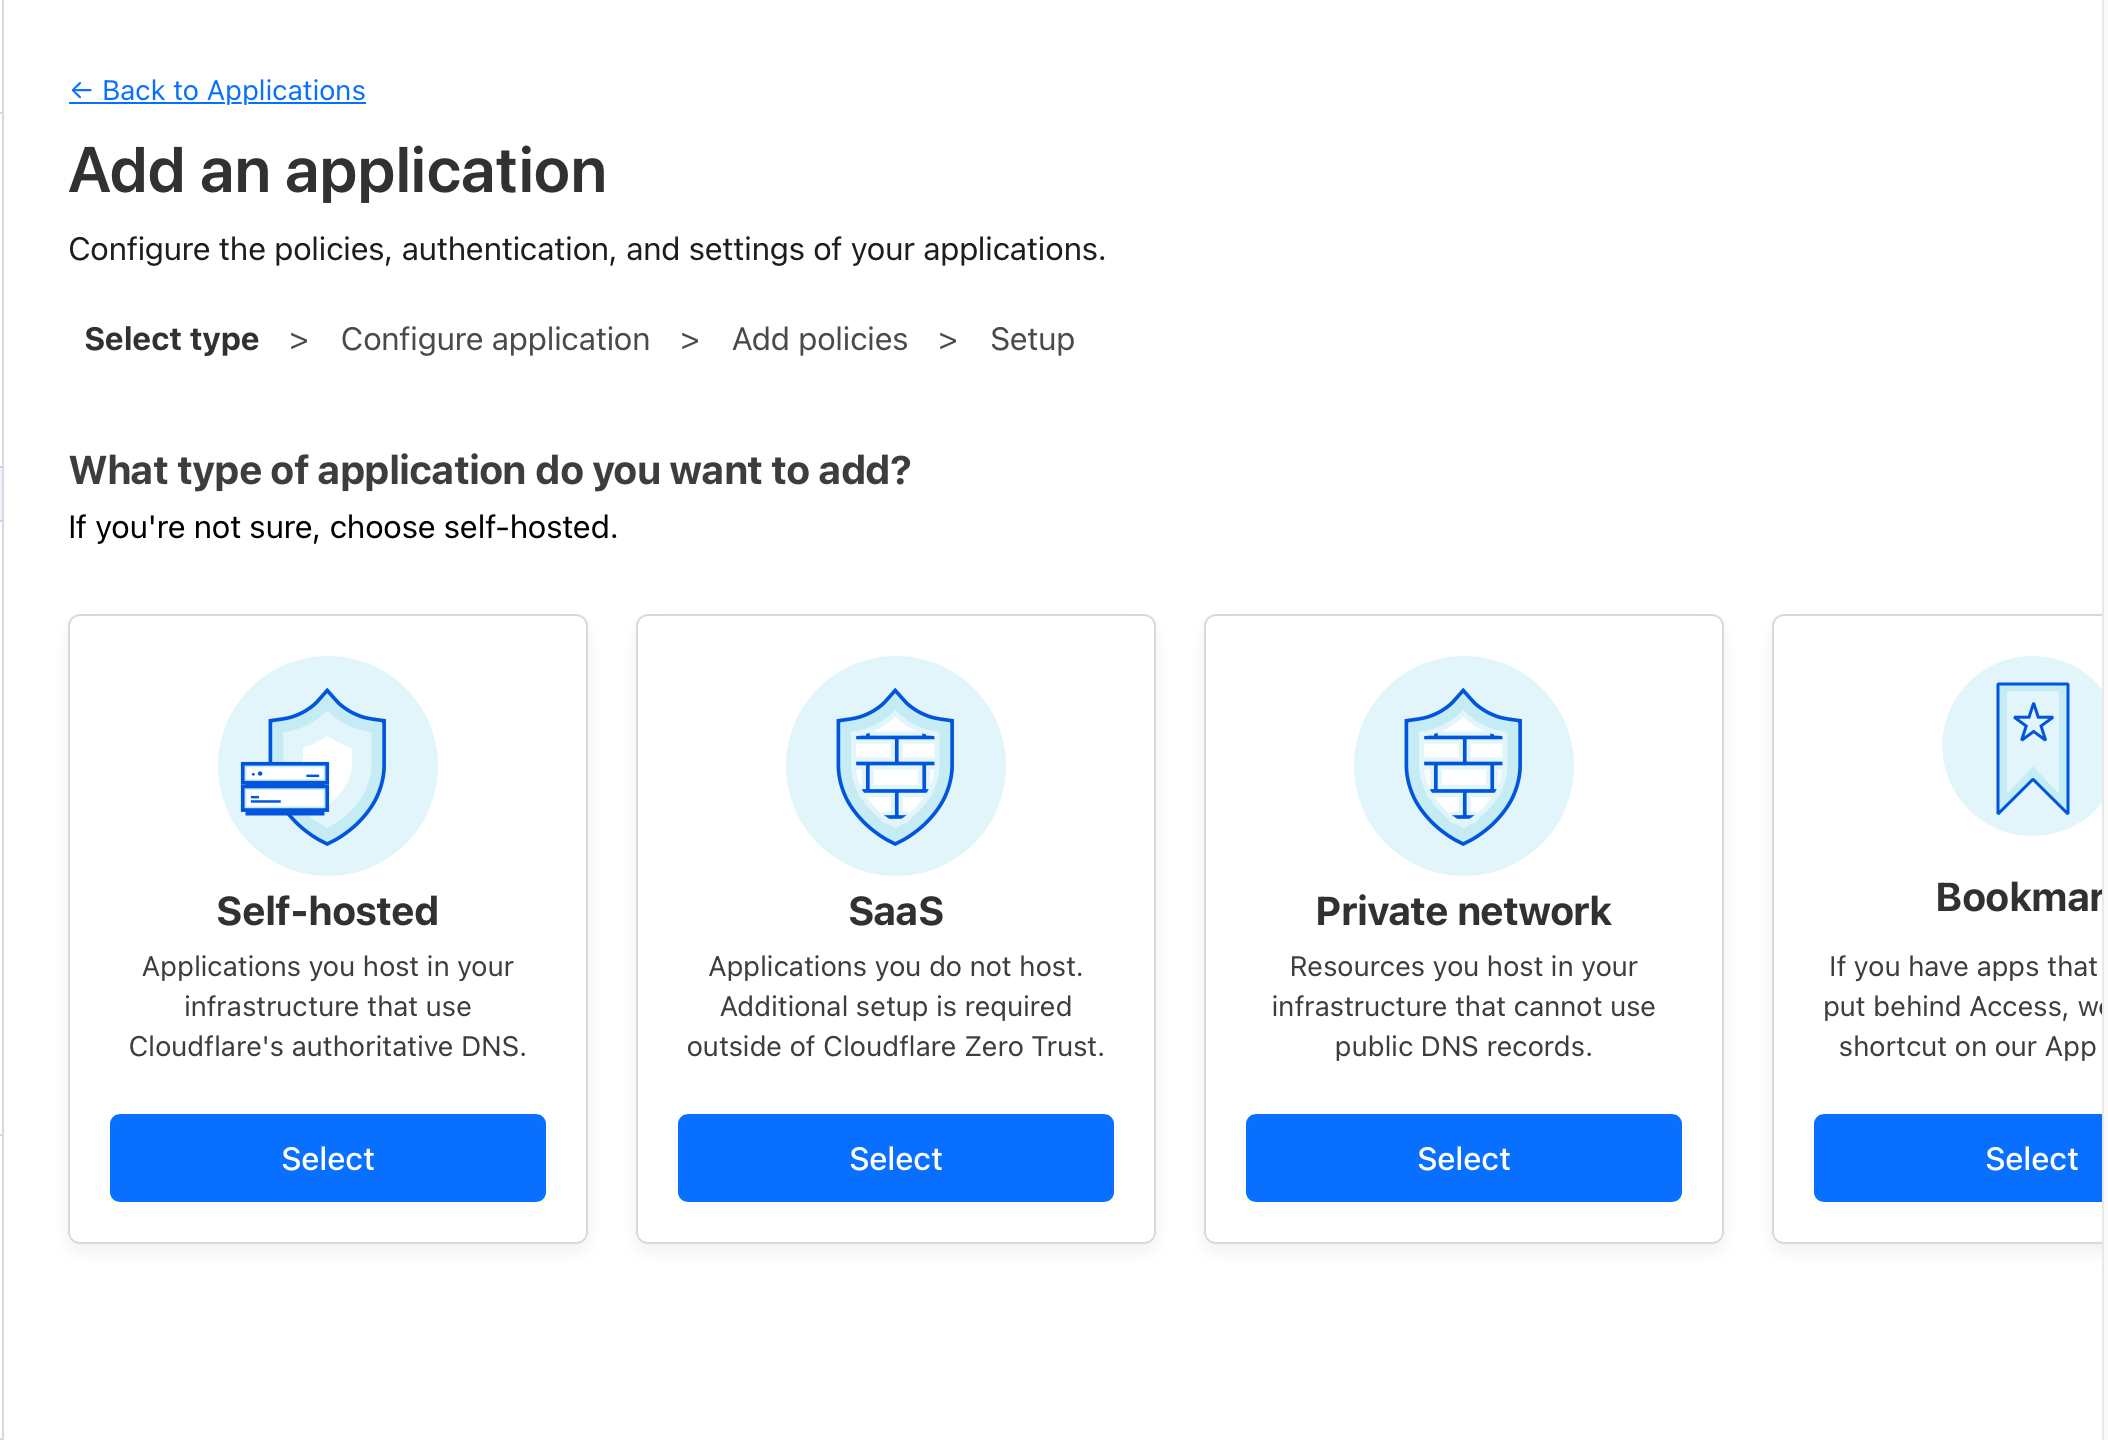
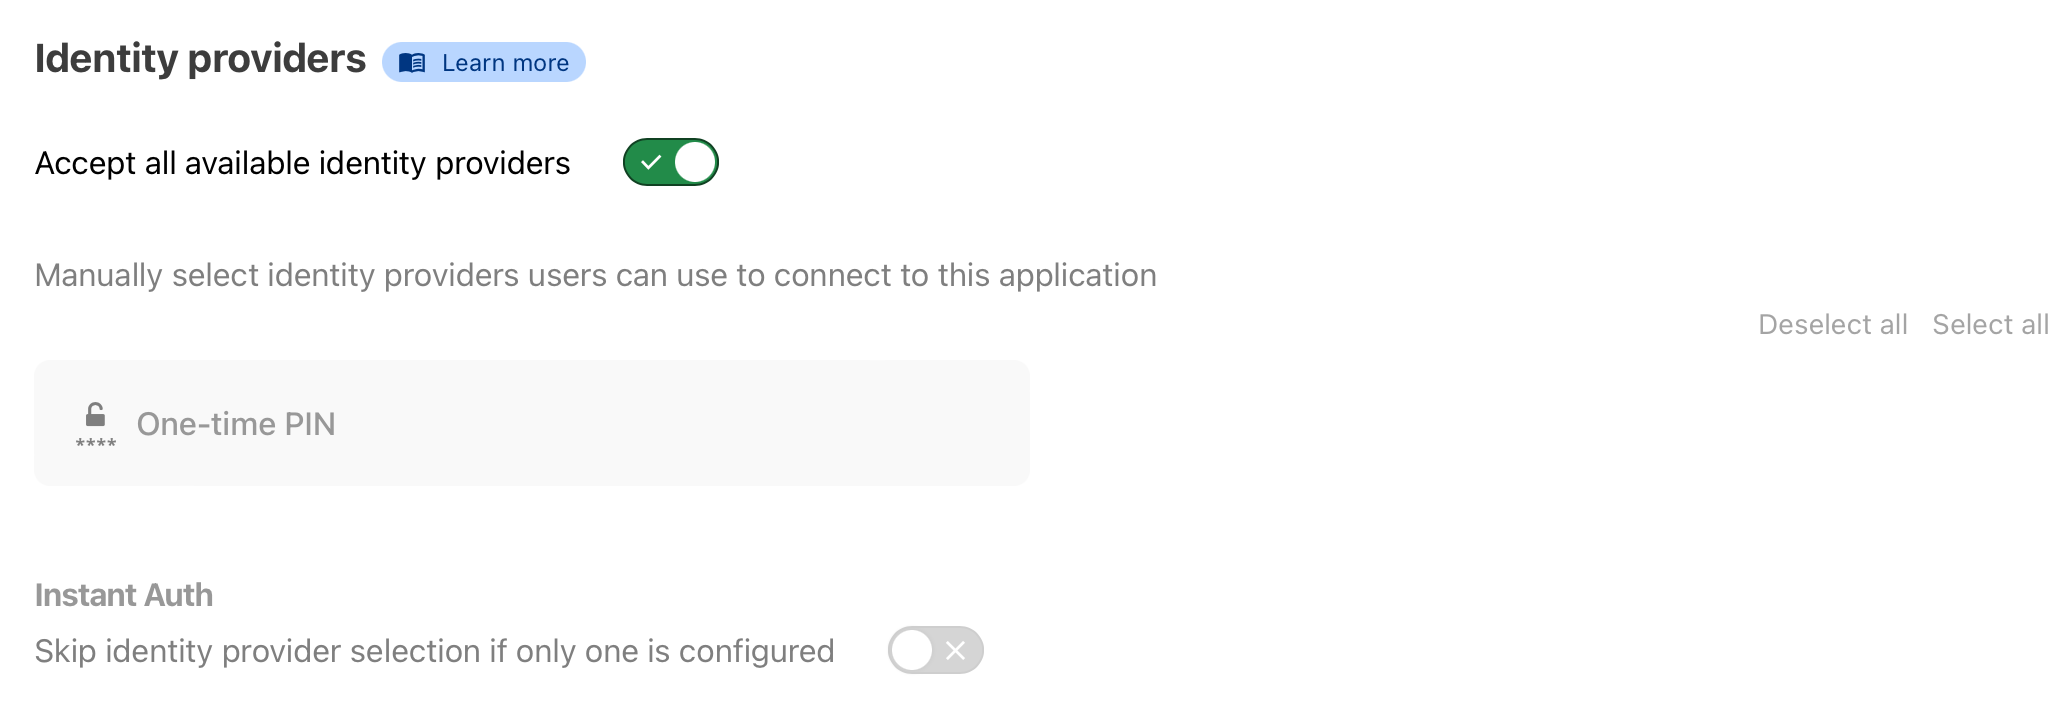
选择Self-hosted,然后添加application name。在application domain里填入上面tunnel设置的public hostname。下拉后勾选“Accept all available identity providers”。
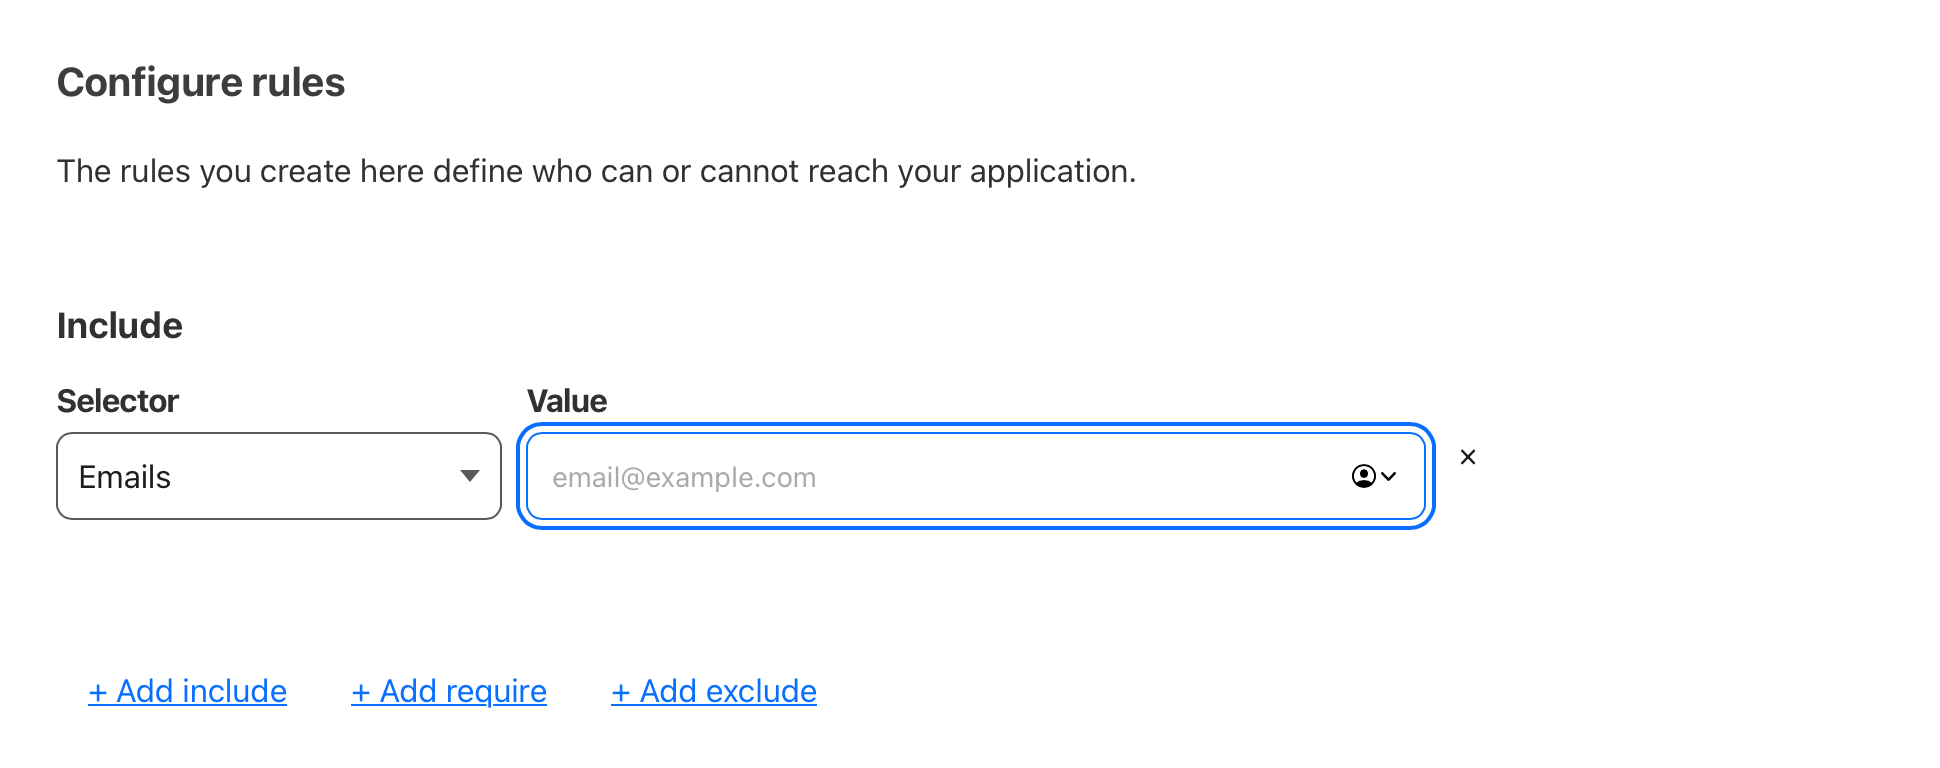
点击继续后创建策略,添加Policy name后,在configure rules里选择Emails,并添加允许访问的邮箱。
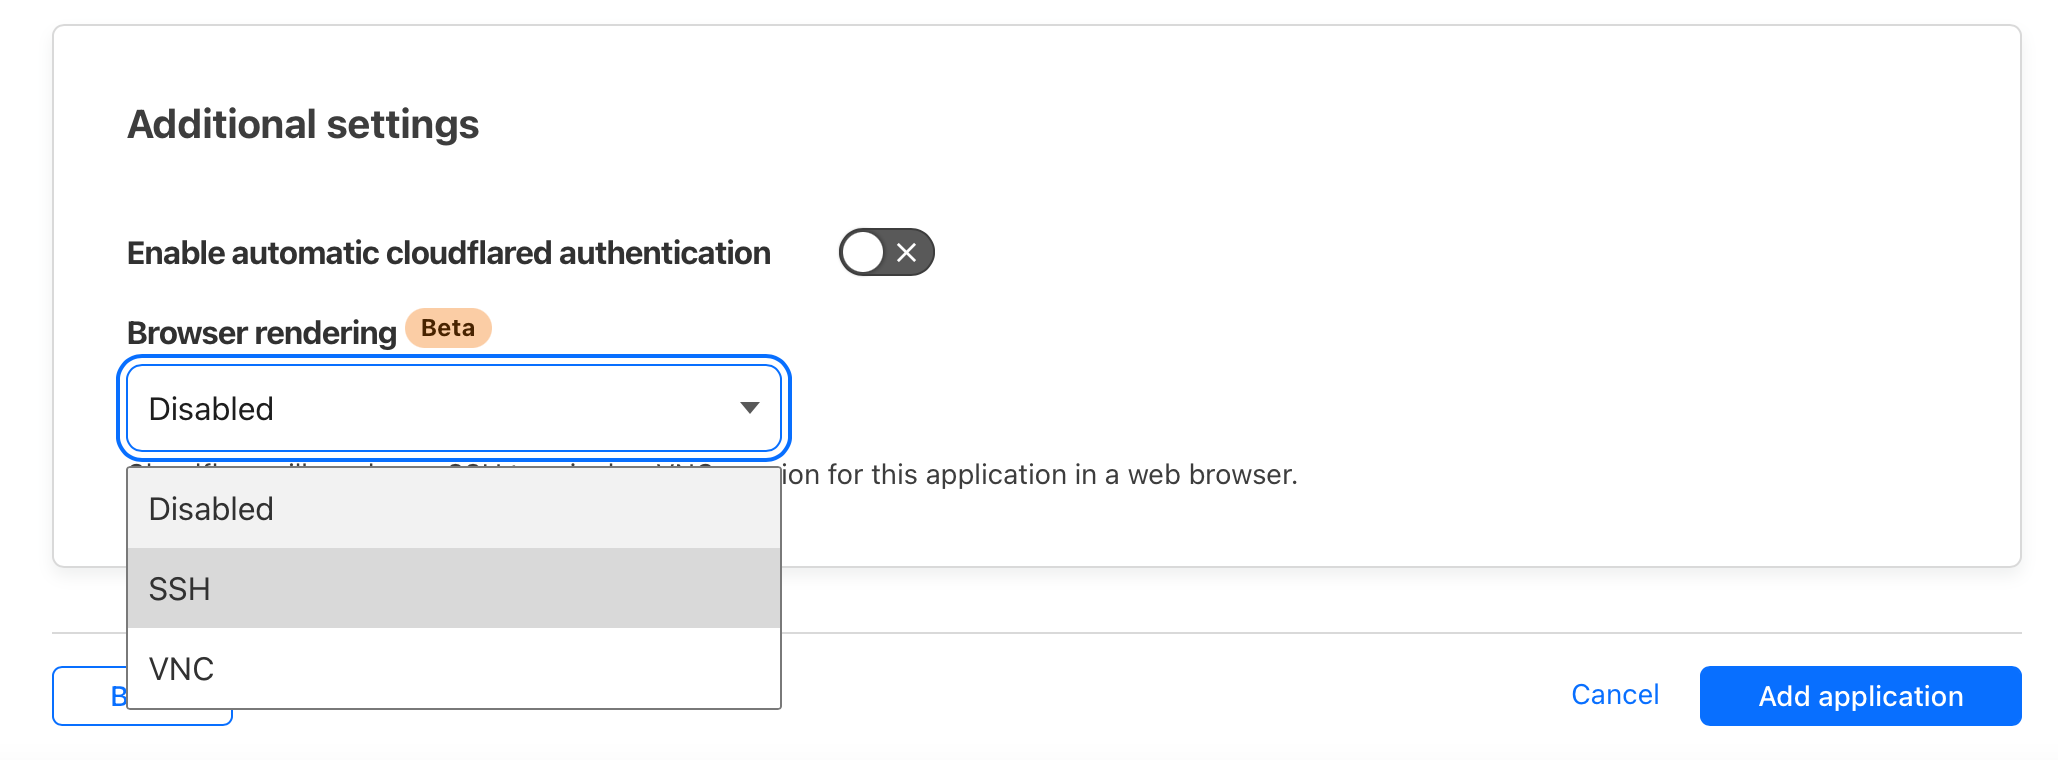
完成后点击下一步,拉动到最后Additional settings,在Browser rendering里选择SSH,完成添加即可。
看情况好像vnc也可以,等有空试试。
Samba文件服务器?
目前还没钱买硬盘,等有钱搞NAS之后看看弄FTP还是Samba。
2025.1更新
最近办公室搬家捡了点垃圾,插个u盘上去却经常掉盘,后面检查后发现一般挂载路径要放在/mnt/目录下才不会掉盘,之前放在/media/下会时不时掉盘。正确操作是先用命令fdisk -l找到u盘设备,例如/dev/sdb2。然后使用挂载命令挂载到/mnt/下的目录,例如:
mount -o uid=pi,gid=pi /dev/sdb2 /mnt/udisk
最后退出u盘命令是:umount /mnt/udisk。
| 微信(WeChat Pay) | 支付宝(AliPay) |

|

|
| 比特币(Bitcoin) | 以太坊(Ethereum) |

|

|
| 以太坊(Base) | 索拉纳(Solana) |

|

|